


When you get into the world of 3D printing it may be for many different reasons. Maybe its just a hobby or you could be starting a business. For whatever reason, you may not have fully considered material usage and costs. So, the question I’m considering in this article is, how much filament does a 3d print use?
The answer can be found in many ways but my intention here is to give you examples of specific models or items that have been printed using filament and to see if it can be measured as to how much filament is needed to 3D print them.
Measure for Measure
3D printing filament is a strange beast as it comes in many different forms and is measured in many different ways.
If you’re already familiar with 3D printing using filament, then you’ll be aware that PLA (Polylactic Acid) is probably the most commonly used material. There are of course other filament types such as PETG, ABS, TPU etc. etc. but for the purposes of this piece I’m going to focus on PLA. This will then give a fair comparison of usage between different models and give you an idea of how different parameters might affect usage.
So, that’s the type of filament covered but what about the measurement? As I said, 3D filament is strange but particularly in the way it’s measured and sold. Typically, filament is sold in rolls or spools of 1KG (2.2 pounds) but there is generally nothing from the manufacturer to tell you how much that weight relates to in length. Have a scout around online though and the general consensus is that there are around 333 metres (1092.5 feet) of PLA in a 1KG spool. This of course allows for the fact that the filament is of a consistent diameter for the whole of its length.
Another factor to consider here would be the diameter of the filament. Obviously, the larger the diameter of the filament, the less distance to weight ratio you’ll get. Therefore, again for the purposes of a fair comparison, the diameter of the filament will also be the most commonly used which is 1.75mm and extruded through a 0.4mm nozzle.
Let’s now then look at other factors that might affect the amount of filament that you use in your everyday 3D printing.
Assessing the Variables
3D printing using filament isn’t just a case of feeding your 3D printer and letting it do its thing. Each model is different and will as a result require different amounts of filament. All of the variables are things that you can set and adjust in the slicing or preparation stage of your model. I’ll go through a few of these variables now for you so you see what I mean,
Model size
Let’s start with an obvious one and confirm that yes, the size of the model will determine how much or how little filament you use.
Infill
This one might not be so obvious but again, the percentage of infill you set for your model will change the filament usage. An average model of an Anime character for instance which is just for display purpose will only need an infill of 20%. However, if your model or object needs more strength or durability, you may want to increase the infill to anything up to 100%.
Wall thickness
The thickness of the outer “wall” of your model can be adjusted to again add to or detract from the strength of the model. The wall of your model is the entire outer skin so to speak so increasing the thickness of this may have a marked effect on filament usage.
Layer height
This would be determined in the “quality” settings of your slicer but lowering this measurement will have the opposite effect that the other settings will have. The lower the layer height, the more layers you’ll have and the tighter they’ll be “squished” together. The quality and overall appearance of your model will improve but you’ll use more filament in the process.
Build plate adhesion
Something that often sneaks under the radar is the amount of filament that is used when using particular build plate adhesion settings. If you use a brim or a skirt around the outside of your model to aid with adhesion then the filament usage is minimal. Use a raft though and we’re then ramping up that usage by whatever the base size of your model is. A raft is great and vital for some models but it’s a heavy drain on resources and causes a lot of waste.
Supports
If you’re printing anything that isn’t a straight sided, uniform shape then you’ll undoubtedly need supports of some kind. Similarly to the build plate adhesion, a couple of supports on a small model won’t use up much filament but place them everywhere on a complex model and well, you know the answer.
Model Examples
So, I’ve set the rules and parameters for our test and shown you some examples of things which will have an affect on filament usage. Now it’s time to look at some examples of different 3D printed models and see if we can find out how much filament does a 3D print use?
The model examples I’m going to show you are all printable files which you can download yourself and print if you wish. For the purposes of the “experiment” I’ve used Cura to slice the files and prepare them for 3D printing as if I were to print them. You may use a different slicer and settings dependent on your preference and printer. The printer I’m using is a Creality Ender 3 V2 Neo which is a pretty common machine amongst enthusiasts.
Unfortunately, I haven’t printed any of these models so the filament usage is based on the Cura estimate and any information added by the designers or other makers.
Anime Girl
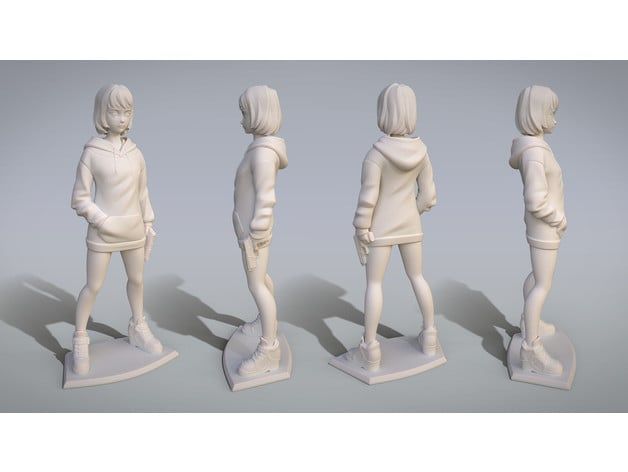
This is a fairly simple model to start with as it will only need minimal supports and the build plate adhesion will be easier with the base included. The designer has printed the model himself at a size of 25cm (9.8 inches) high and suggested supports but only a 10% infill. However, the body and head are separate files so might use a little more as you’ll need a larger build plate adhesion area and supports.
The file can be downloaded for free from Thingiverse.
Infill: 10% - Grid pattern
Supports: Yes – Grid pattern – 10% density
Build plate adhesion: Brim
Layer height: 0.2mm
Wall thickness: 1.0mm
Estimated filament usage: Body – 157g ( 5.538 oz) or 52.74 m (173.03 ft)
Head – 18g (0.635oz) or 6.07 m (19.915 ft)
Saitama (One Punch Man)
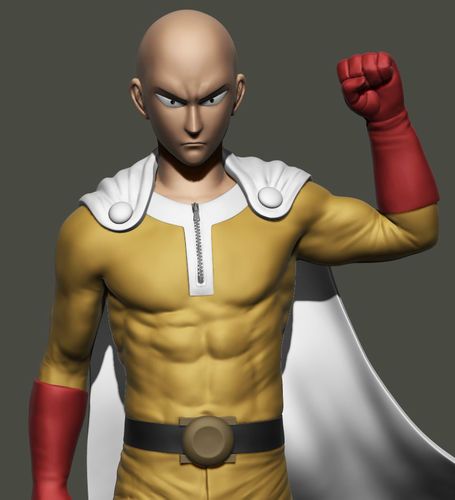
Saitama is the eponymous hero of the One Punch Man series. If you want to find out more then have a look at my article “One Punch Man Manga” for an insight.
This model is a bit more of a challenge in terms of supports due to the cape but the settings are exactly the same as the previous one. The original file was miniscule so I increased the scale by 3000%(!) to get it to a more manageable height of 184mm (7.25 inches). Again, it doesn’t need more than a brim for adhesion and the good news is its all in one piece this time.
The file can be downloaded for free from CG Trader.
Cura settings
Infill: 10%
Supports: Yes – Grid pattern – 10% density
Build plate adhesion: Brim
Layer height: 0.2mm
Wall thickness: 1.0mm
Estimated filament usage: 112g ( 3.95oz ) or 37.6m (123.36 ft)
Pikachu (Fanart)
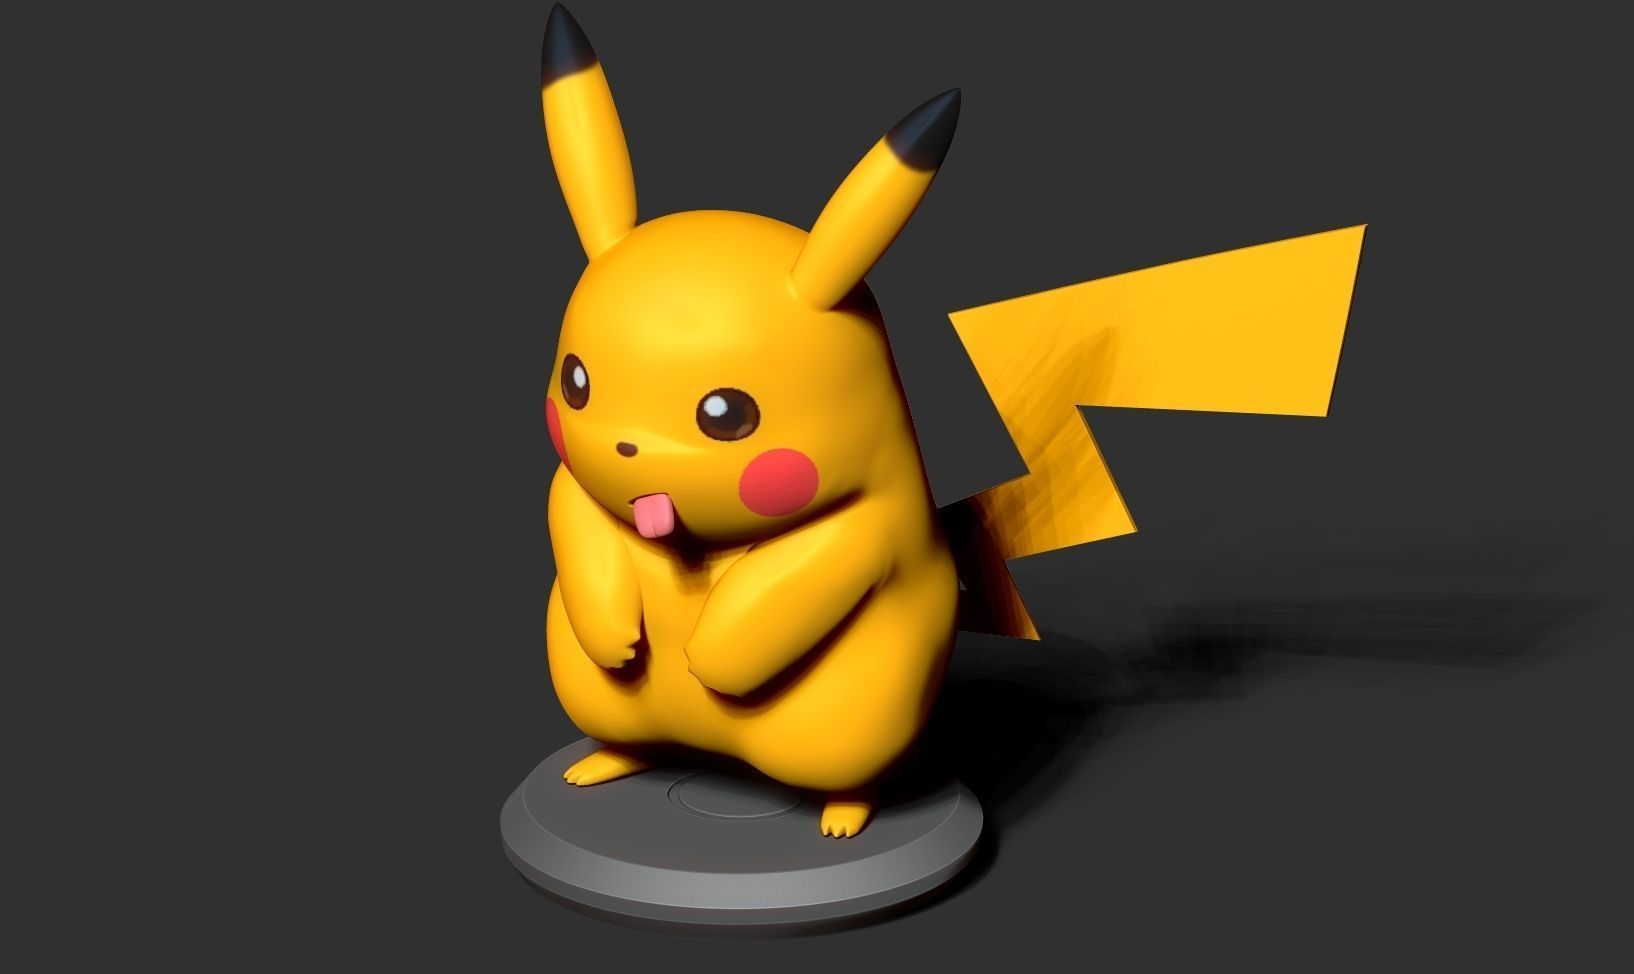
This one is a bit different but a nice little model of favorite yellow Pokemon. At first glance, the challenge with this print which may add to your filament usage is the tail. However, the model itself is in three parts so you can adjust orientation etc. to reduce build the plate adhesion area. The model is made up of 4 separate parts but I was able to add them all onto the same print.
The file can be downloaded for free from CG Trader
Cura settings
Infill: 10%
Supports: Yes – Grid pattern – 10% density
Build plate adhesion: Brim
Layer height: 0.2mm
Wall thickness: 1.0mm
Estimated filament usage: 55g (1.94oz) or 18.49m (60.66ft)
Monkey D. Luffy (One Piece)
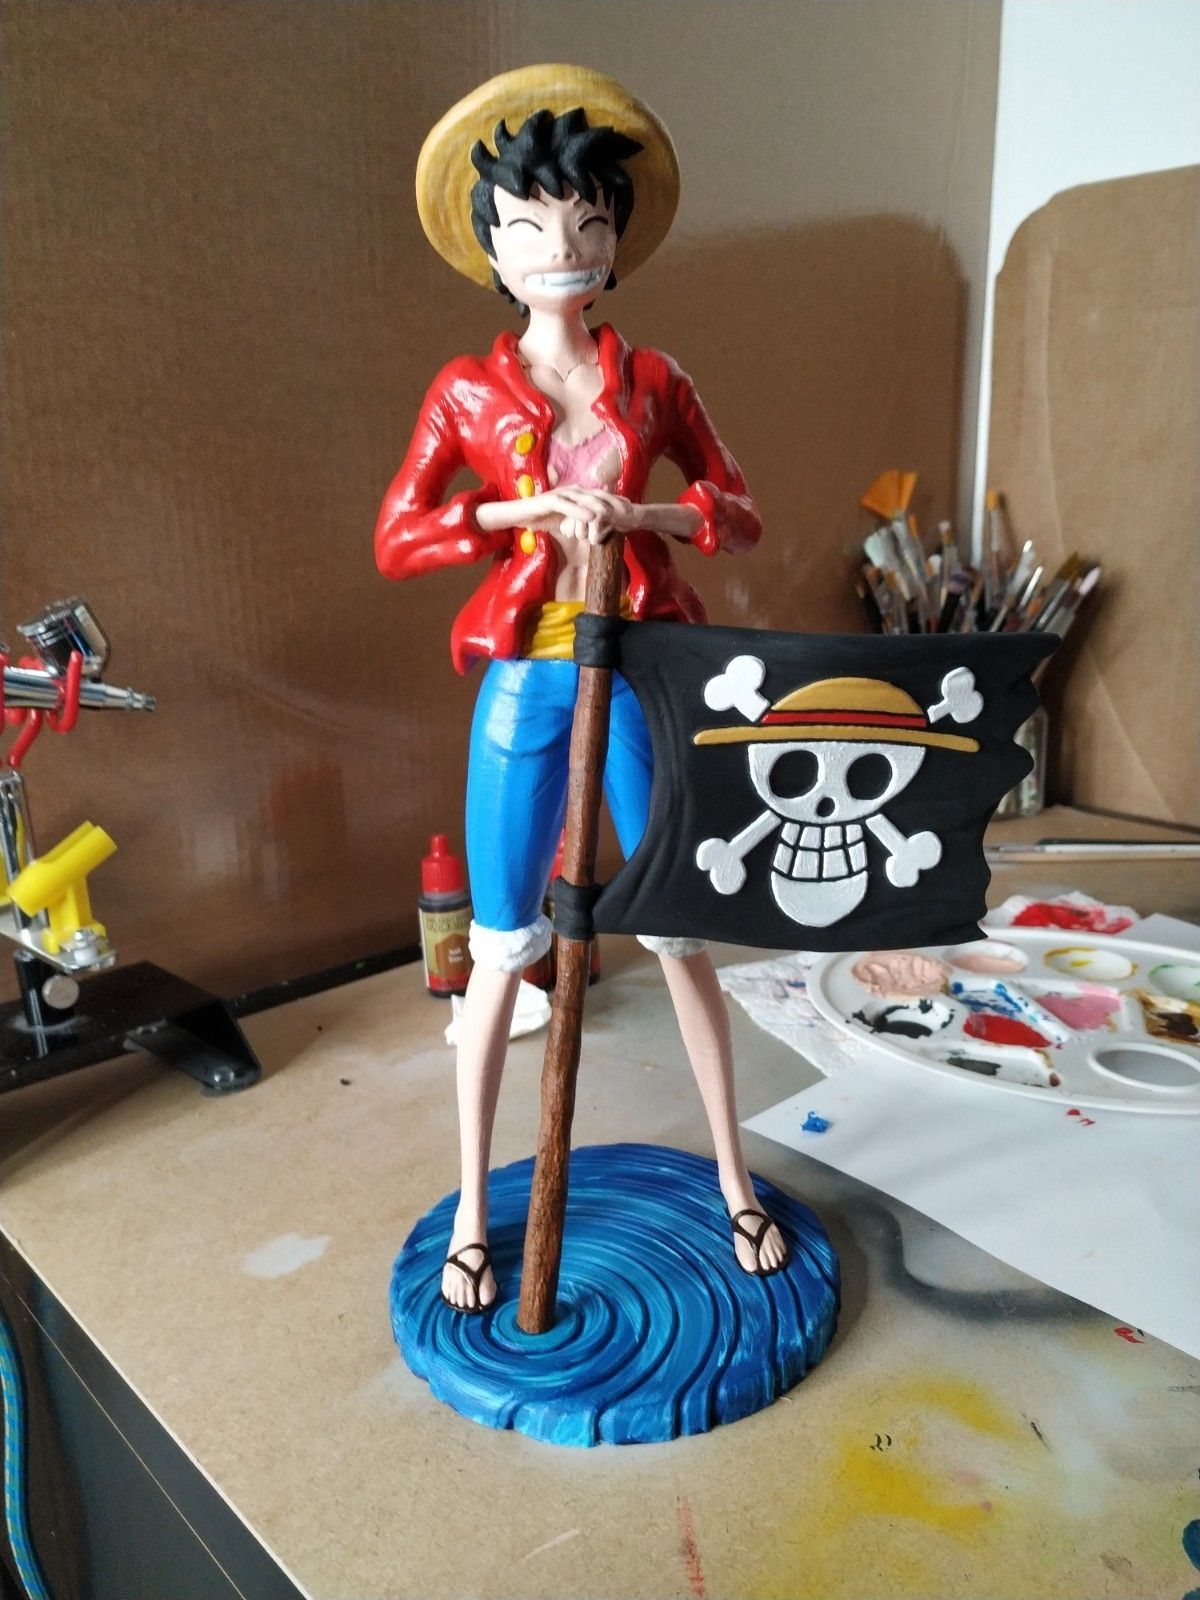
Perhaps one of the best known and most popular of Anime characters, this model is again a nice representation and would look good as a display piece. Ironically though, the model doesn’t print as one piece but is in fact split into six different files.
With some rearranging, I managed to fit all of the pieces into the build plate so that they’ll all print together. I used a raft for this though as some of the pieces such as the legs and the flag needed that extra bed adhesion and stability. This has of course though added to the filament usage. Note though that if you do decide tom ,print this in the same way I’ve set it and using a similar size build [plate, you’ll need to set the “Raft extra margin” to 0.0mm otherwise it won’t fit.
The file can be downloaded for free from Cults 3D.
Cura settings
Infill: 10%
Supports: Yes – Grid pattern – 10% density
Build plate adhesion: Base – Brim
Luffy and flag - Raft
Layer height: 0.2mm
Wall thickness: 1.0mm
Estimated filament usage: Base – 51g (1.8oz) or 17.15m (56.27 feet)
Luffy and flag – 203g (7.16oz) or 67.9m (222.8 feet)
Fat Yoshi
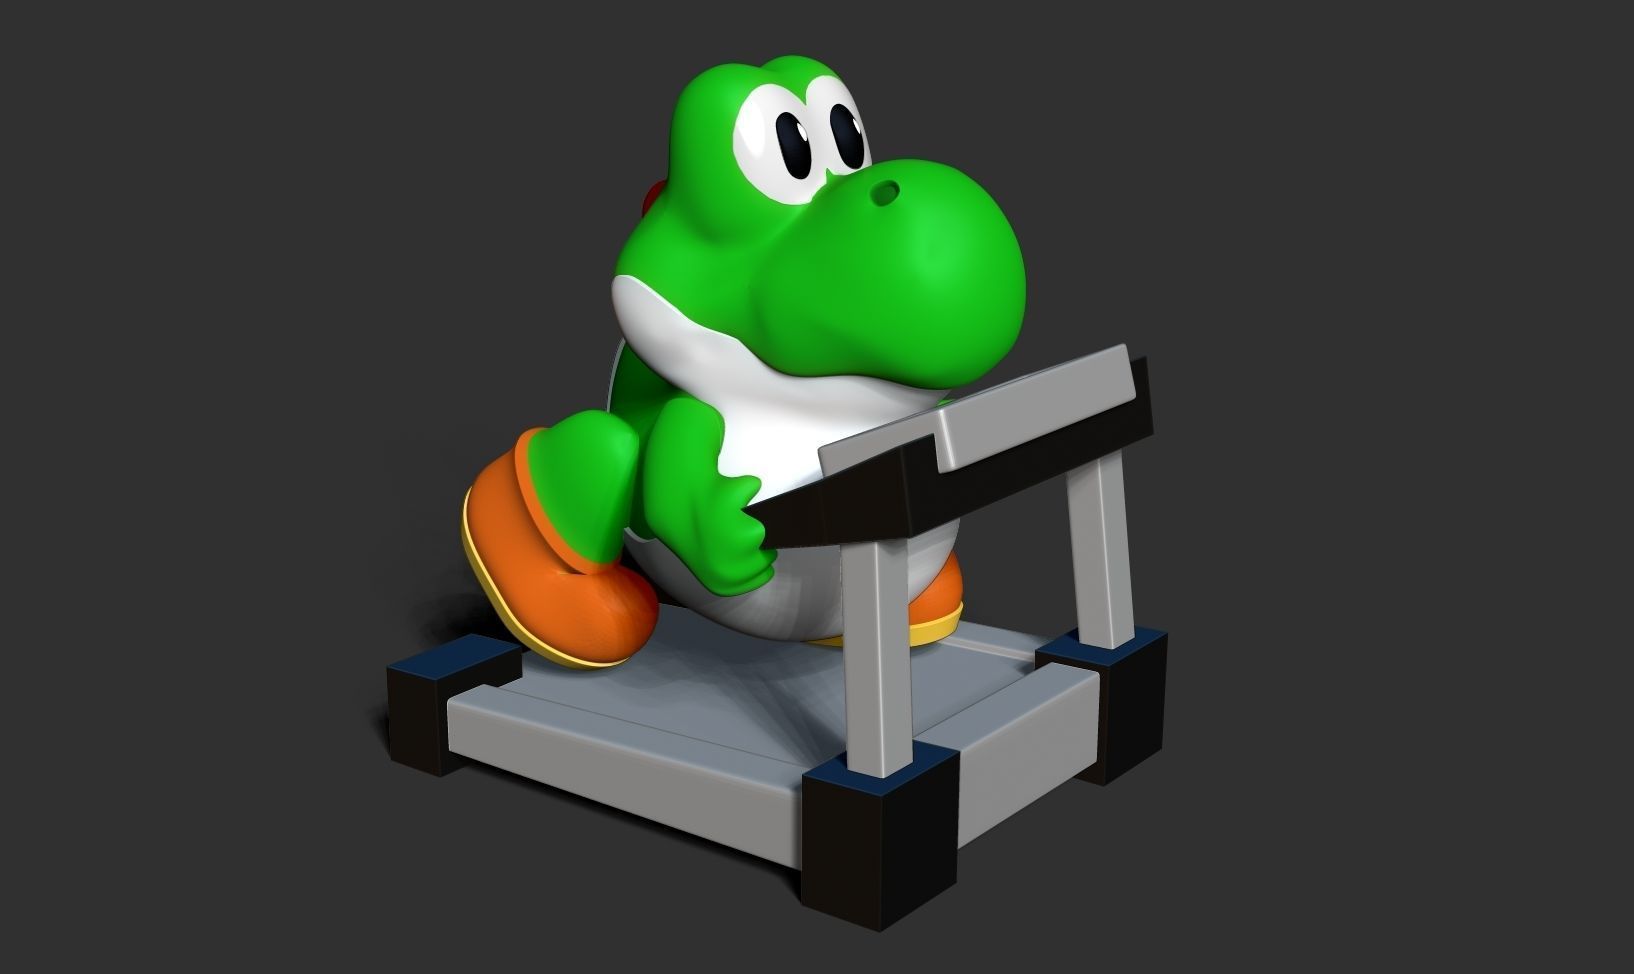
This one is just a bit of fun but goes to my Mario obsession! This is another piece of fanart which gives an insight into the training needed to keep fit enough to carry Mario around!
The model itself is designed in two separate parts for printing and I didn’t change the scale at all from the original.
The file can be downloaded for free from CG Trader.
Cura settings
Infill: 10%
Supports: Yes – Grid pattern – 10% density
Build plate adhesion: Treadmill – Brim
Yoshi - Raft
Layer height: 0.2mm
Wall thickness: 1.0mm
Estimated filament usage: Yoshi - 144g (5.08oz) or 48.44m (158.92ft)
Treadmill – 135g (4.76oz) or 45.37m (148.85ft)
Spy x Family Loid Forger Lapel Pin
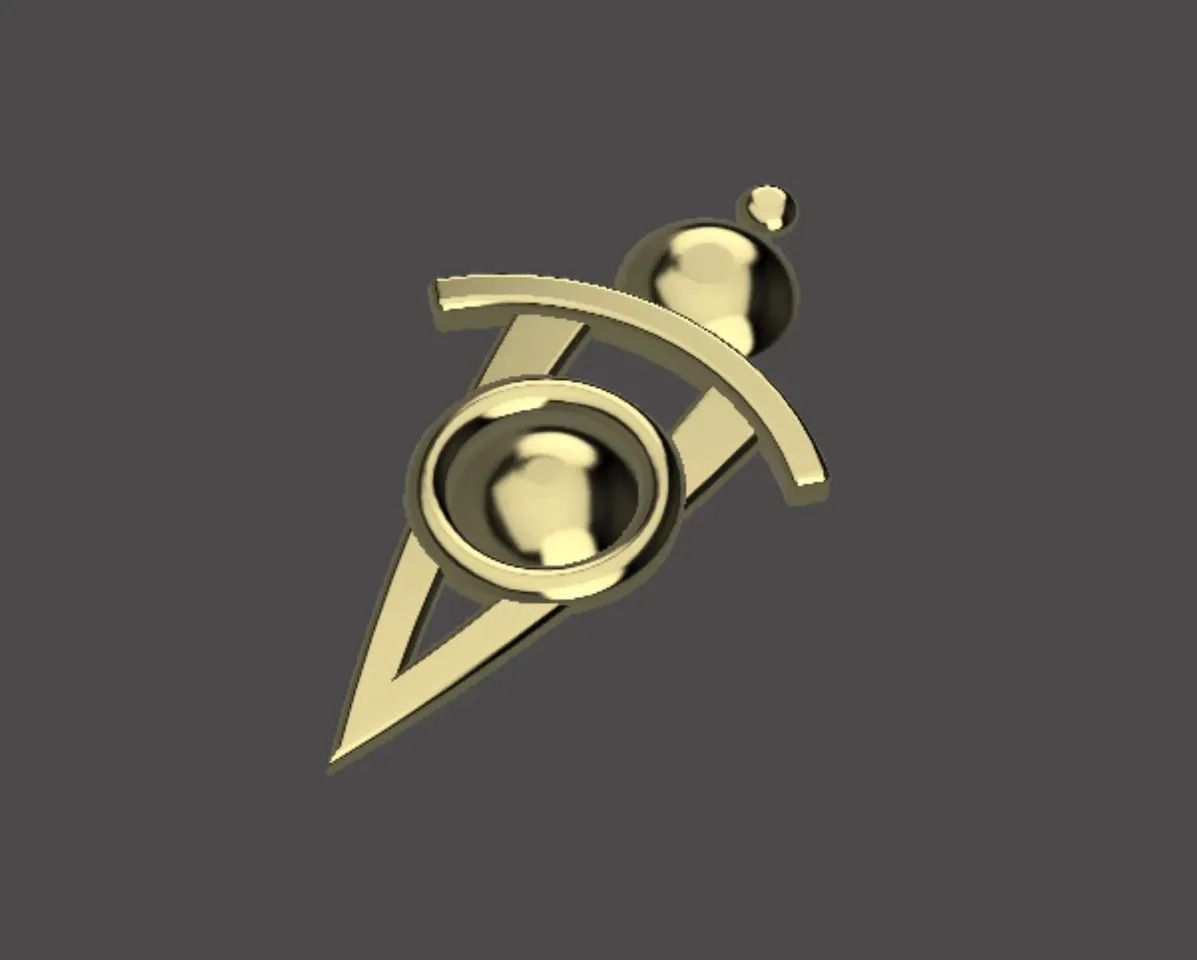
A bit of a change here and this is really to give you an idea of the difference in scale vs filament usage. This is a cosplay item which is quick and easy to print but still of good quality.
It does though only use a tiny amount of filament which makes sense due to the size.
The file can be downloaded for free from Printables
Cura settings
Infill: 10%
Supports: No
Build plate adhesion: Brim
Layer height: 0.2mm
Wall thickness: 1.0mm
Estimated filament usage: 1g (0.035oz) or 22cm (8.66 inches)
Goku (Dragonball Z)

Back to character figures for the next one and this is a bit bigger and depicts Goku from the immensely popular series, Dragonball Z.
The design is made in two separate parts which would be best printed separately unless you have a larger scale printer or reduce the size of the models. I kept the scale of the original design and as you can see, it used a fair amount of filament. You’ll also notice that I used two different build plate adhesion settings for each part. The stone is flat and stable so only really needs a brim if anything but the figure will need a raft for stability.
The file can be downloaded for free from CG Trader.
Cura settings
Infill: 10%
Supports: Yes – Grid pattern – 10% density
Build plate adhesion: Stone – Brim
Goku - Raft
Layer height: 0.2mm
Wall thickness: 1.0mm
Estimated filament usage: Stone – 74g (2.61oz) or 24.88m (81.63ft)
Goku – 51g (1.8oz) or 17.16m (56.3ft)
Shoto Todoroki (My Hero Academia)
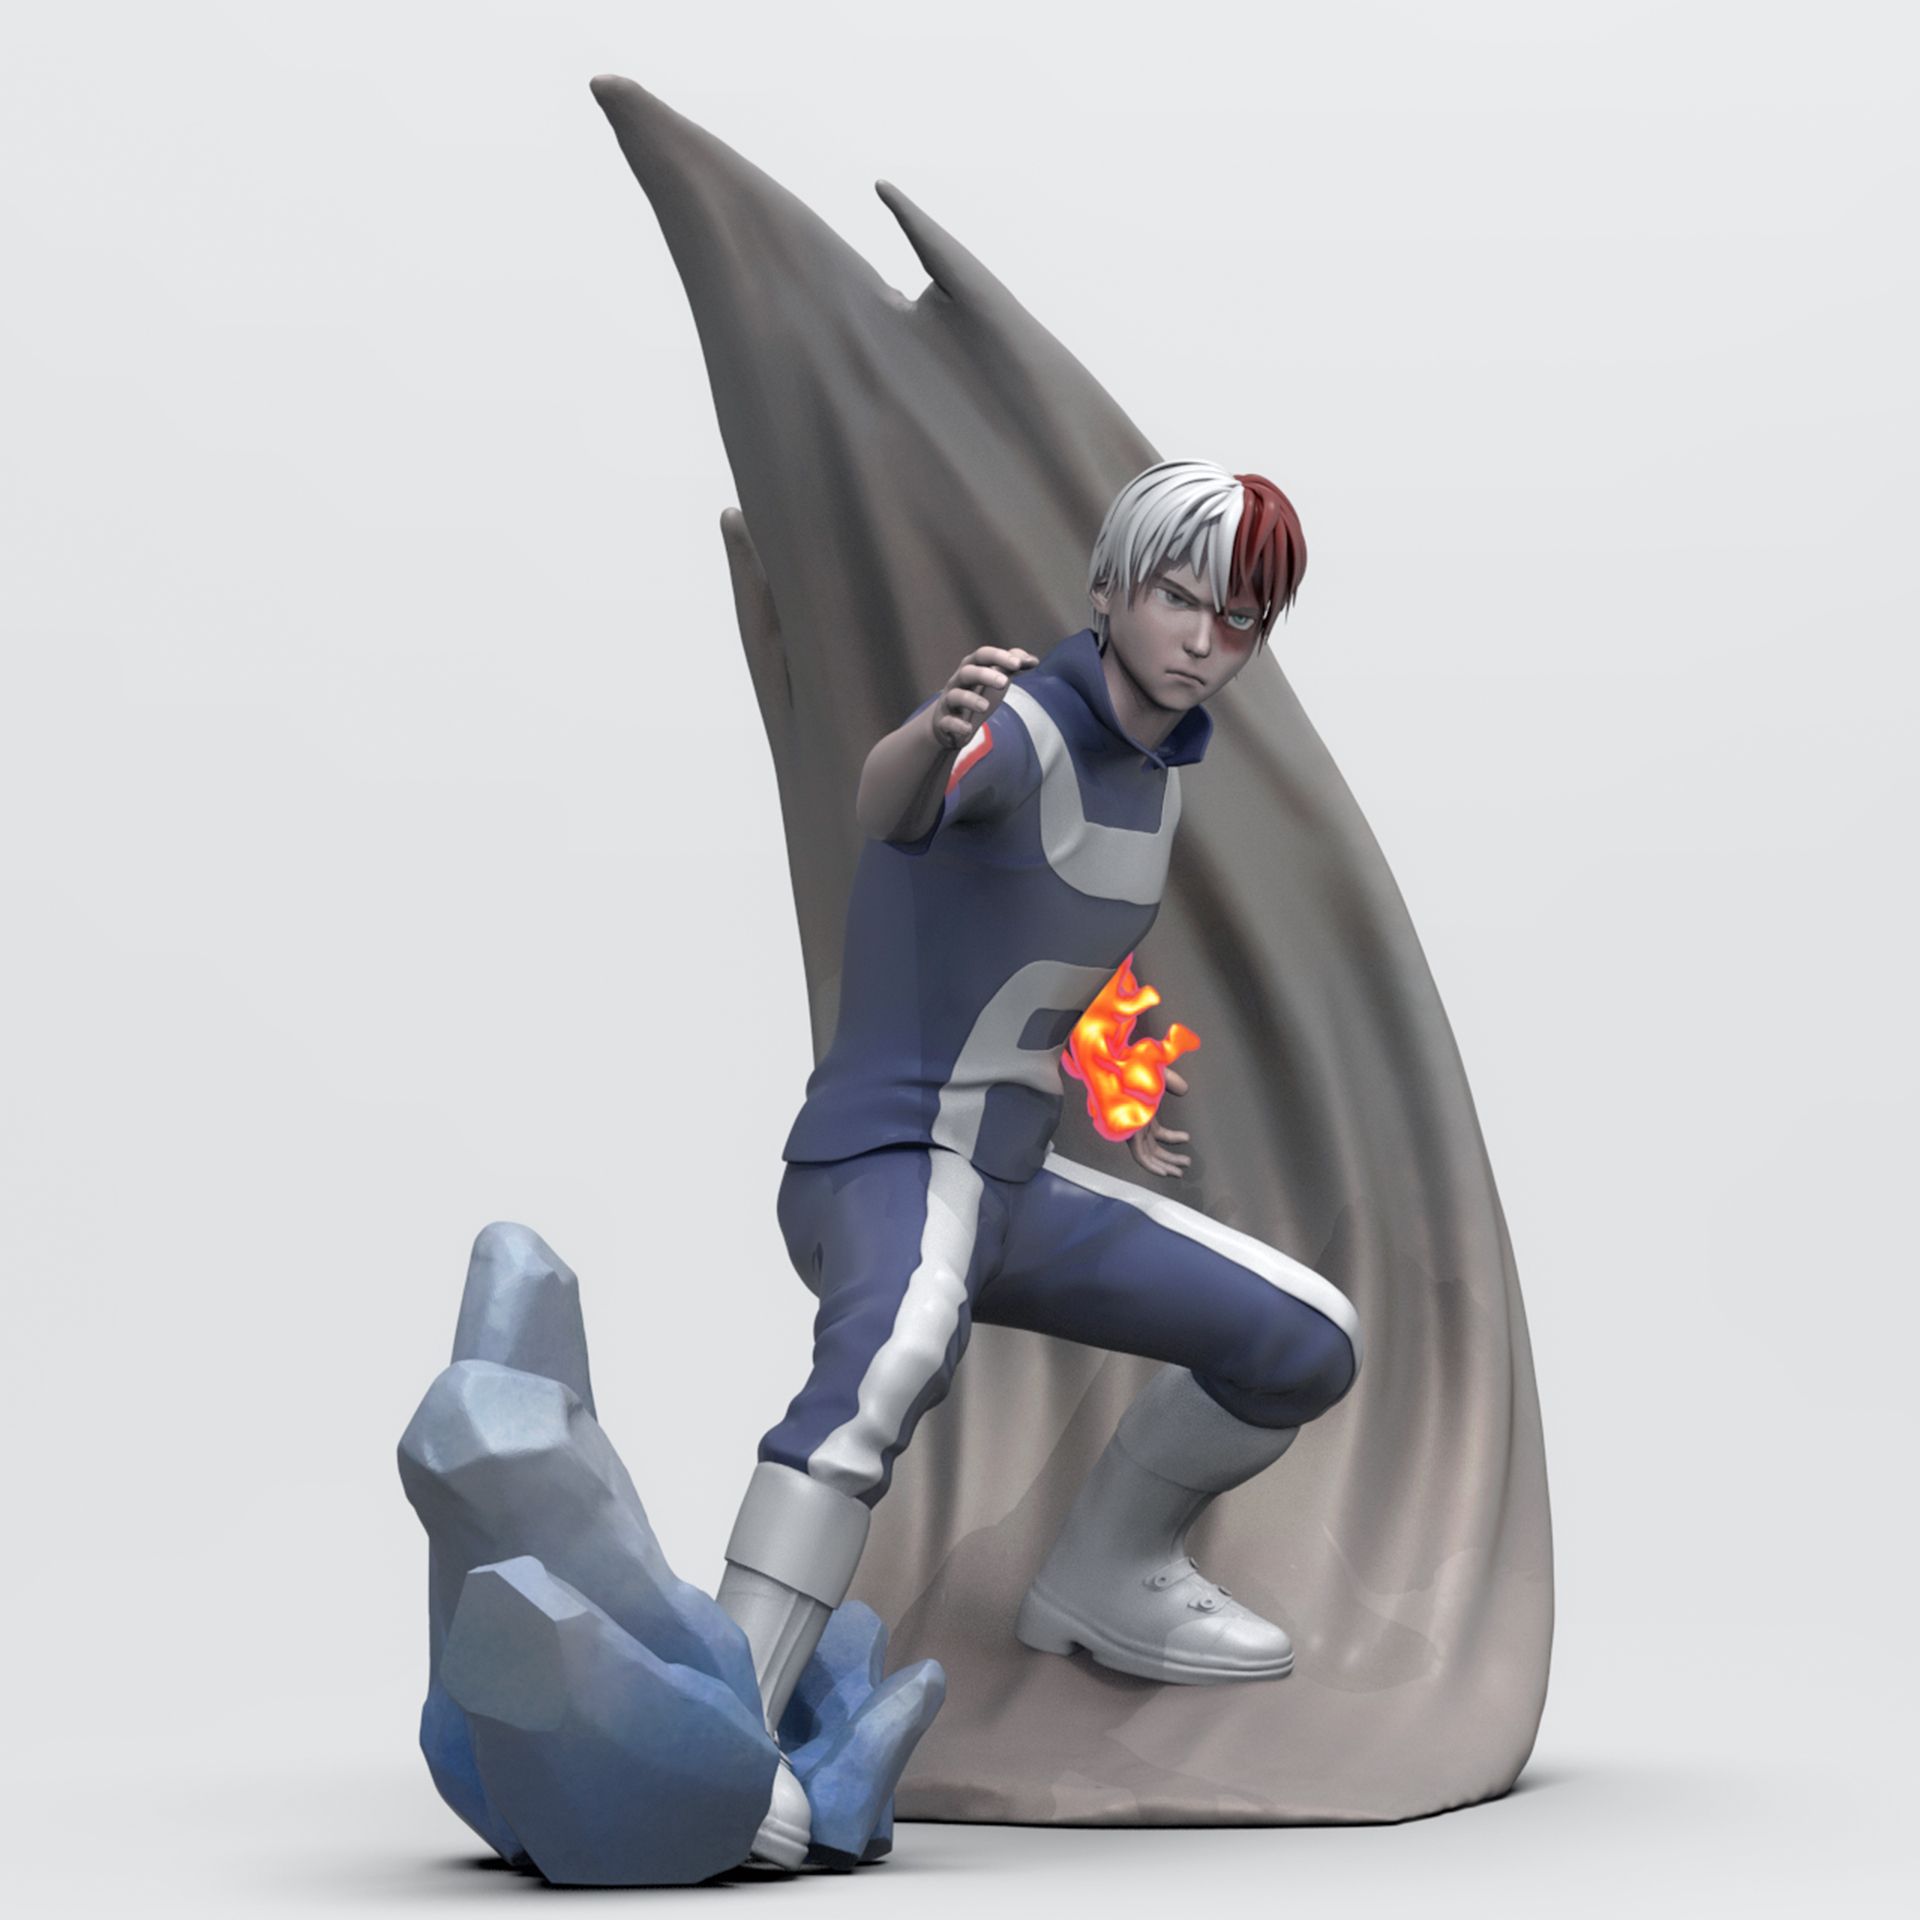
Another figure but with a dynamic pose and this has a few different parts. The character is Shoto Todoroki from My Hero Academia. Be careful is you search for it though as the designer has misspelt the name! I’ve added the link though so you’re all set.
The file can be downloaded for free from CG Trader.
Cura settings
Infill: 10%
Supports: Yes – Grid pattern – 10% density
Build plate adhesion: Raft
Layer height: 0.2mm
Wall thickness: 1.0mm
Estimated filament usage: 110g (3.88oz) or 36.88m (121 feet)
Nezuko (Dragon Slayer)
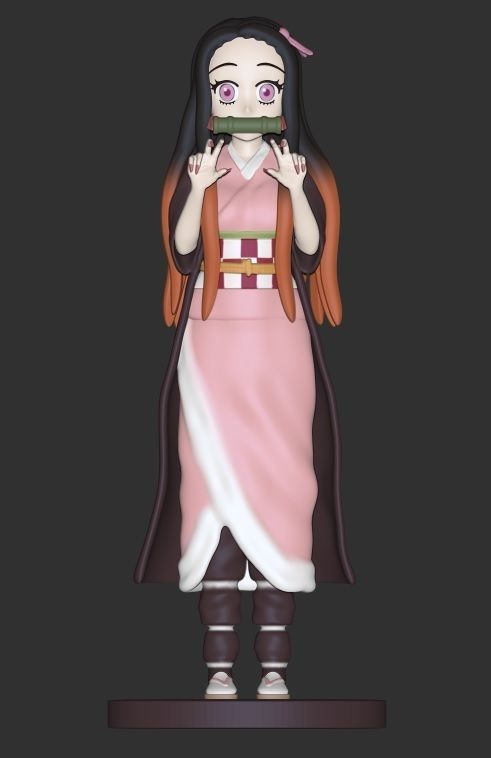
The demon/human hybrid sister of the hero Demon Slayer Tanjiro Kamado, Nezuko cuts a solemn figure. Have a look at my article, Unravelling the Demons and the Slayers: A Comprehensive Guide to Demon Slayer Seasons and Arcs! If you want to know more.
If you do decide to download and print this file then you’ll find that, similar to the Saitama model, its ridiculously small. I therefore increased the scale to 800% which made the overall height of the model just over 200mm (7.87 inches).
The file can be downloaded for free from CG Trader
Cura settings
Infill: 10%
Supports: Yes – Grid pattern – 10% density
Build plate adhesion: Brim
Layer height: 0.2mm
Wall thickness: 1.0mm
Estimated filament usage: 133g (4.7oz) or 44.48m (145.93 feet)
Demon Slayer- Hanafuda Keychain
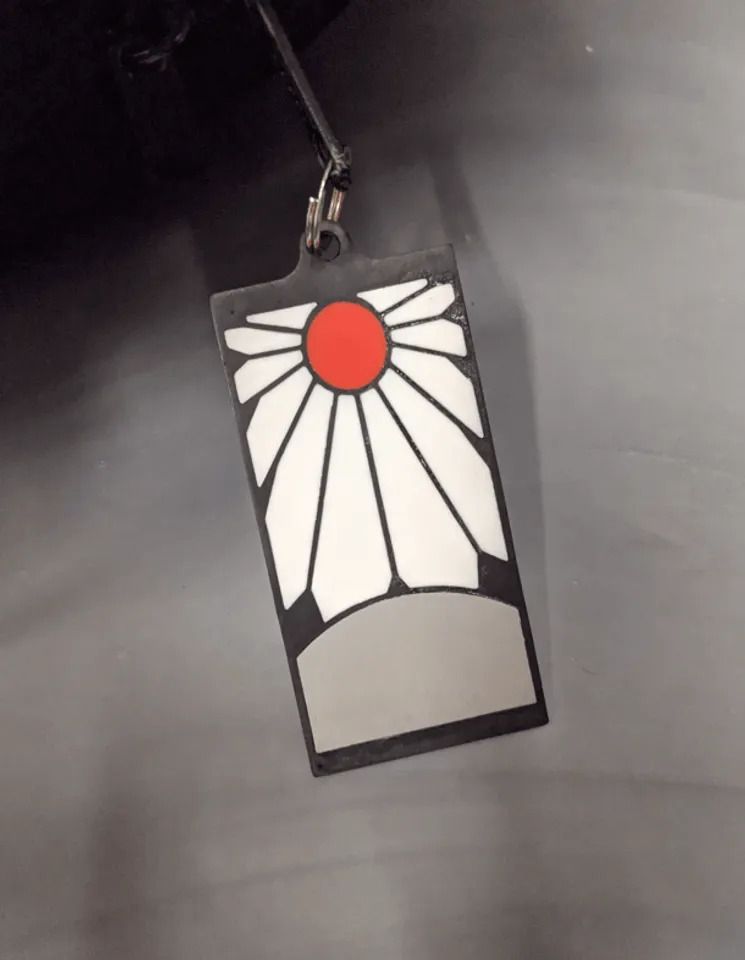
Staying with the Demon Slayer theme with our last model which is a keyring but depicts a representation of one of the earrings that Tanjiro wears throughout the saga.
The model is separated into four parts which allows you to then print each one in the required colour. This then avoids the need for painting and makes for a slicker look. I sliced the four files as one print for ease though to get one figure for our experiment.
The file can be downloaded for free from Printables.
Cura settings
Infill: 10%
Supports: No
Build plate adhesion: Brim
Layer height: 0.2mm
Wall thickness: 1.0mm
Estimated filament usage: 11g (0.39oz) or 3.74m (12.27 feet)
The Final Count Up
I’ve shown you ten different models in a variety of sizes and with slightly different settings in some cases. You may have already done the sums yourself but in case you haven’t then I can tell you that, if you were to print all of these models, you’d need 1.255 KG (2.77lb) of filament. That’s just a roll and a quarter of filament used to create all those wonderful models.
If you also relate that to the length of the filament, according to Cura you’ll be using a total of 421.12m (1381.63 feet). So, based on the average length of a 1KG roll that I mentioned right at the start, that also relates to a smidge over a roll and a quarter. Maybe Cura’s estimates are accurate.
There are a couple of caveats to those figures though. Firstly, as I’ve said, these are figures as estimated by Cura so they may not be exactly the same in practice. Secondly, you may of course not get a great print first time or your print may indeed fail. This would add to filament usage but is an incalculable variable which we won’t concern ourselves with for now. You are of course all expert printers with perfectly calibrated machines so won’t have any wasted filament, right?
Stock Up & Measure Smart
- PLA filament (1kg spools) — buy in multipacks to save.
- Digital scale — weigh spools to estimate remaining material.
- Digital calipers — dial in flow and dimensional accuracy.
Get Side Quest — our weekly anime + JRPG newsletter, free →
As an Amazon Associate, Geeky Inc earns from qualifying purchases.
Wave 1 — Kitsune Legends Vol. 1
Wave 1 is live.
Four hand-printed fox-spirits. One sealed box. You don't choose your kitsune — you summon it. Limited run, no restock.
Summon your Kitsune on Etsy →


Member discussion